Are your family photos strung all over the house, in boxes, drawers, and closets? Learn how to organize them properly with the help of photographer Amber White. Completing this challenge will be a gift for yourself and children & you will be pleased when its finished.
- Take out all of your photos from your nooks n crannies… ALL OF THEM!
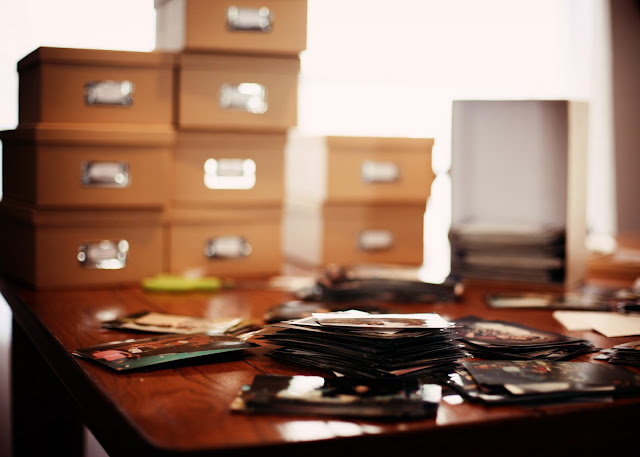
- Find a clear space to lay them out… the kitchen table works great.
- Separate them into {year} first (as best as you can remember)
- After you have separated into year, then separate into chronoligical order (if you wish)
- Label each box by year (if you take a lot of pictures) or a few years together
- Make dividers and label your event categories or months.
- Now start organizing!
Do you have beautiful, wonderful, memories that are sitting somewhere collecting dust? Or are they frozen on your hard drive somewhere just waiting to be printed and showed off? The beginning of February last year I decided it was time. Time to organize those boxes full of mismatched, misplaced pictures. I wanted organization and I wanted it to look nice. I wanted to be able to file pictures away and know exactly where they were. I wanted to be able to go to the box I needed when my kids would come home with projects for school and they would need pictures of themselves. But most of all, I wanted to be able to keep these memories from getting wrinkled, torn and ruined from lack of organization. This is a long post, so pour yourself some coffee (or tea) and sit back and enjoy….
Before I begin telling you how I organized my pictures and displayed them to look nice, or how I made a book full of 369 pages to be able to look through and reminise I want to show you something. It is a short video, but it is a great one to watch……..especially before you begin this task of organizing your pictures.
I don’t know if you are sentimental about pictures like I am, but I thought this video was cute. It shows just how important pictures are. They are important, but why do we not store them and take care of them the way we should.
To begin this project you will need the following:
- Pictures Boxes (one per year)
- All Pictures (yes, get them ALL rounded up)
- Paper and Scissors
- Pen
- Large work area, tables are best.
- Kleenex
- Relaxing or Sentimental Music (optional but it helped me stay on task)
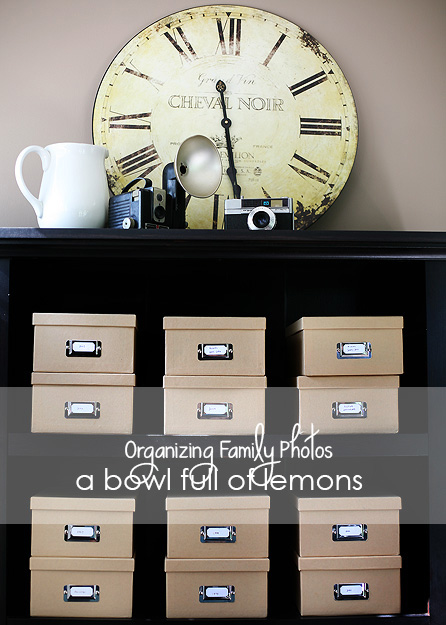
I began my picture organizing by making a plan first. I knew I didn’t have a lot of pictures of my husband and I when we were dating (or at least not enough for three boxes to be filled up) so I decided to put all of our pictures (1994-1996) in one box. I knew I went digital with my pictures in 2007 so I needed enough boxes for each year from 1997 to 2006. I purchased my picture boxes at Hobby Lobby (if you wait until they are on sale, you can get them for $1.99 per box).
I then labeled each box with a folded piece of paper cut to fit in the front of the box. I labeled it by year. You can label it however you like, but for me…..by year was the easiest.
I then started the grueling task of putting pictures into the year they belonged in. Thankfully, some were already somewhat organized….but it still took me a while. Once I was started though I didn’t want to stop.
But I did. I would have a load of laundry to switch out, kids arguments to settle, dinner to start (if you are a busy mom you know how it goes)……but I went straight back to the picture organization project as soon as I was finished. I started out by year. I put all of our pictures in order/stack by year. Then I placed them in the box they belonged in. I knew this was going to be a project that would take some time, especially considering I had 11 boxes. Just getting all the pictures in the boxes by year felt like I had accomplished something big. After I finished sorting them by year. I would work on organizing each box when I had a chance. I used the same concept as organizing by year. But this time I pulled a box out (whatever year I was wanting to work on) and sorted the pictures the best I could by event and timeline/month. Every once in a while I would find our kids looking at the table and smiling, asking me where a certain pictures was from, or how old they were in a certain picture…..
That validated it even more for me. I knew that I wanted my children to one day be able to look back on all these pictures and memories and remember that little, fleeting space of time. Kleenex? If you are halfway through the project you will know what the “Kleenex” are for. Looking at pictures of my 12 year old boy, pictures of his curly hair, or the cute scrunched up face he used to make at me……you will know what the Kleenex are for. After I finished this project, I went a step further. Only because I was on a roll and I wanted it all to be organized. I then purchased a box for negatives, and boxes for VHS tapes (which I soon hope to put over on DVD) and also boxes for CD’s of pictures starting from 2007.
I then organized all the digital files on my external hard drive. By year, then month then event. It feels good knowing one of the things that is so very, very important to me is nice and organized now. I also knew I wanted to do more. I wanted to be able to look at these pictures, the memories and all the journaling I did of these memories. I made a book, a lovely, lovely book from Blurb . So far I have our 2007 book in print. I am now working on our 2008 book when a get a little bit of free time here and there. I am almost finished with it (up to Halloween of 2008) and I cannot wait to order it. It feels like Christmas to me when these books arrive. I have kept a blog for several years which has made putting these books together so easy. I plan on “eventually” having a book for each year. I found a place that was well recommended to send negatives off to, they scan them and put them to CD (much easier than those machines you can buy to do this….my opinion they didn’t do well). This place is called Scan Cafe.
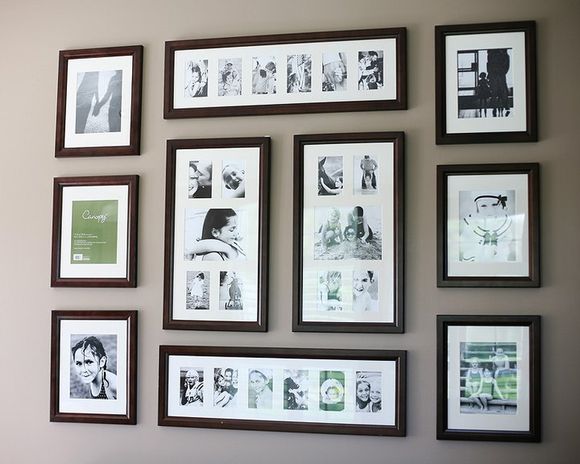
Below are a few pictures of our 2007 family book I designed… This book made it all worth while. It also made it easier to put together a collage of pictures in our living room we remodeled……
(just to give you some perspective on the size of my gallery wall, my two year old nephew)
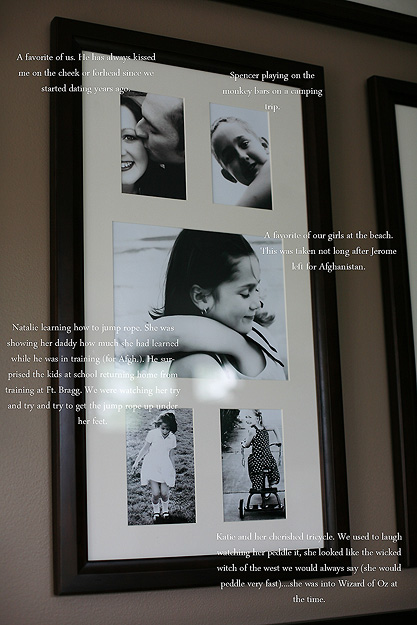
A more detailed idea of the gallery wall……(by the way, my inspiration for this was Pottery Barn)
I hope you enjoyed this post, I hope it motivates you to get started on a picture organizing project such as this…..when you are finished it will feel wonderful to know that you have tucked away all your precious memories for safe keeping.
Tags: organizing, photo organization
21 day challenge, Organize, Other Spaces, photo organization, pictures Posted in
17 comments














GORGEOUS boxes and I love the photos you shared with us!
Unfortunately I cant do this challenge b/c my wedding photos are being held hostage and I have only digital photos right now. eep!
I love what you did though! its amazingly organized!
xoxo
Jenn @ Peas & Crayons
And we have how long to do this challenge???
Seriously tho, I’ve recently started organizing my photo prints and it will take me a good month to go thru them. I have 40+ years worth! And I don’t even want to think about the digital photos…
Most of mine are organized, but I haven’t actually produced any real photos {other than to put on the wall} to store in ten years!! Everything is now digital for us and we have it all backed up off site and on CDs in a fire safe…you are certainly the expert being the photographer that you are! I’m glad you tackled {and are tackling} this one because this one is probably not up my alley!
Becky B.
http://www.organizingmadefun.blogspot.com
Organizing Made Fun
I don’t think my photos could get any more organized… Actually, I have been doing photo books (with my digital prints) since 2005, but all the older photos are ALL in albums and in the correct order. Also, I have scanned in every last photo that I have taken since I was 12 years old, and they are all in folders on my computer (and backed up multiple times in different places) all in the correct order, by year, month (and day since January 1998) … I can’t get any more organized than that! *lol*
http://scrapgrrl.com
Why oh why am I crying my eyes out at the Kodak video? It’s gonna be one of those days!
Oh man, I really wanted to see pictures of her blurb book but they’re missing. I’m working on one right now for my family. I’ve heard great things about blurb books.
Photo organizing is on my to do list. Right now, I have them placed in boxes like this too. Someday I want to get them in albums, so my little family can enjoy them.
DaNita
I hope I’m not the only one that cried at the Kodak video. *sniff* I’m completely inspired to do this now!
Thanks so much for sharing! This is something I really need to do. I can’t wait to read through all the other links too.
I was hoping there would be a few others out there that cried at the Kodak video too…..I cried when I first watched it!
For those interested in seeing pictures of the blurb book, I have them up on my blog now if you would like to take a peek….
http://www.houseofathousanddreams.blogspot.com
I LOVE my blurb book and would suggest it to anyone wanting to make something such as this!
That video made me cry!
Me too! lol.
I so need to organize my photos. I have been meaning to for years. I love the boxes from JoAnns. I have never seen these at my local JoAnns.
Yay! An area of my home which needs no organizing!!! I have everything either in albums or stored digitally. Whew!
Just FYI but if you live near a Hobby Lobby they have their photo boxes on sale for 50% off this week (through 2/12). They have some nice ones with bookplates to assist you in labeling. HTH!
Wow! Besides being incredibly crafty, you’re also a great photographer! Can’t have a better combination of talents… 🙂
Love this! Family photos are so precious. I love the feature of the photo books as well. I design custom photo books for families looking to commemorate their special memories. https://www.etsy.com/shop/RebekahDanielsStudio