I had on my list to purchase 8 magazine storage boxes, this week at the store. But when I priced them, I didn’t want to pay the prices. (At any given store they ranged from $5-20 each). So, I went home and researched how to make them myself! It is amazingly easy! My husband even helped with the cutting & wrapping. Thank you!!
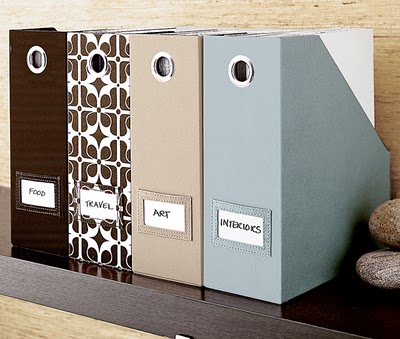
The magazine “butlers” from West Elm are $18 each. Love the store, but no thank you!
These are the older style (not available anymore) from West Elm. I love the brown designed one!
If you’re like me and don’t want to pay the price to have these, you can make them yourself. The directions are below.
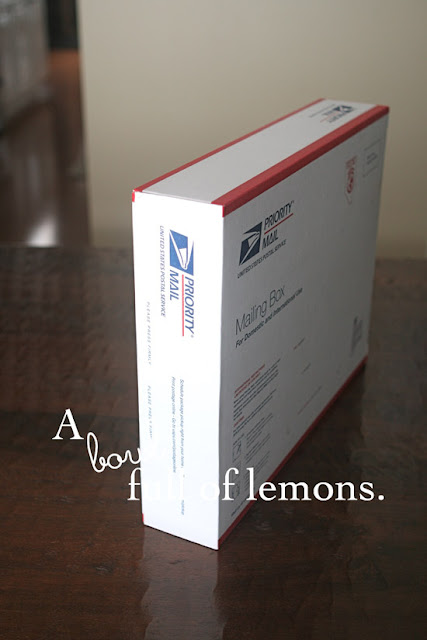
You will need 1 box for every 2 organizers you wish to make. I used some left over usps boxes I had from my photography business. I only used 4 boxes and got 8 organizers.
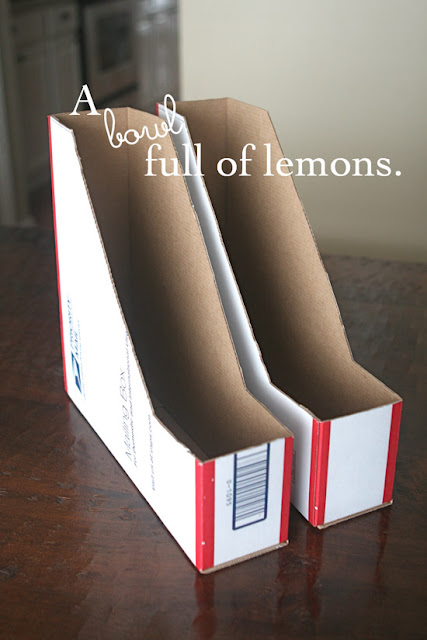
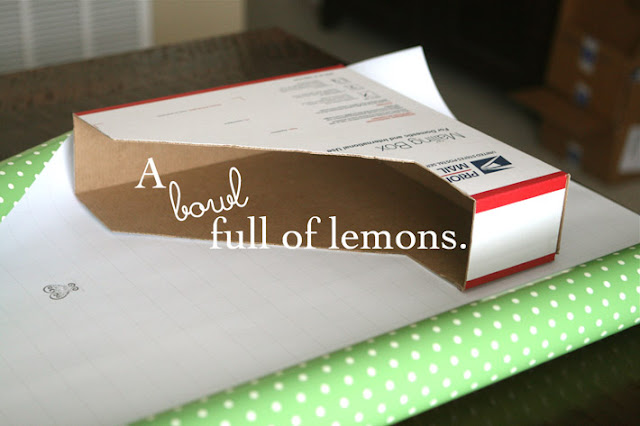
Draw your template on the first box. If the box is standing tall, you will make a line 4 inches up and 3 inches wide from the left side. Flip the box from bottom to top and do the same. Then flip over the box, and pencil in the same measurements, making sure to match up with the other side.
Using a box cutter, carefully cut over the lines. Use the first box as your template for the additional boxes.
Here is what it looks like (this is one complete box)…
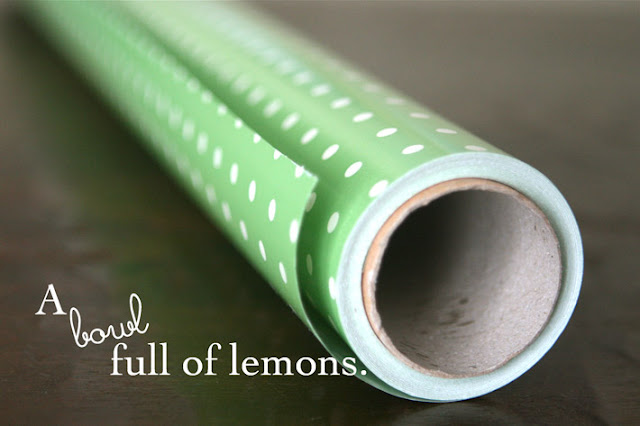
Now you are ready to decorate it! You can use any style of wrapping paper you wish, but remember to use a good quality/thick wrapping paper, or it will tear easily.
If you know me well, you know that I LOVE anything polka dot, so when I spotted this paper at Hobby Lobby, I about screamed! It was 50% off. It’s very high quality, thick paper. They have many other adorable papers to choose from as well.
Now, all you have left to do is start wrapping…
It was a little time consuming, but a rewarding completion. We saved from $40-160 (depending on the store) by doing them ourselves.
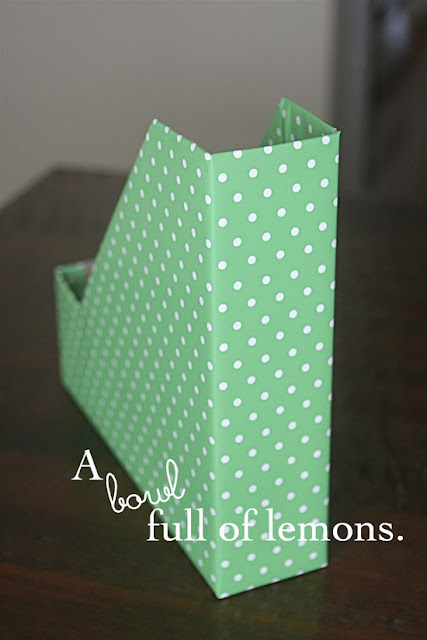
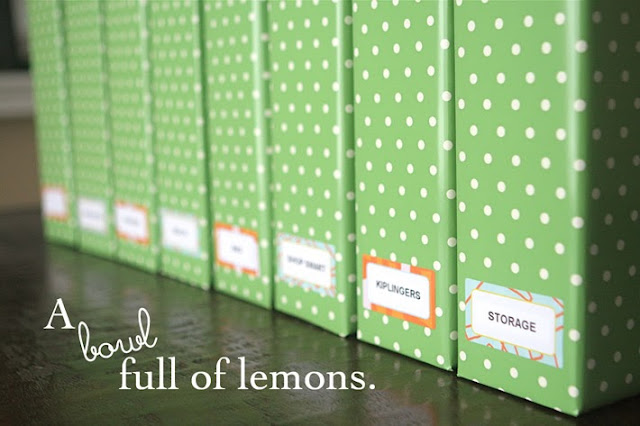
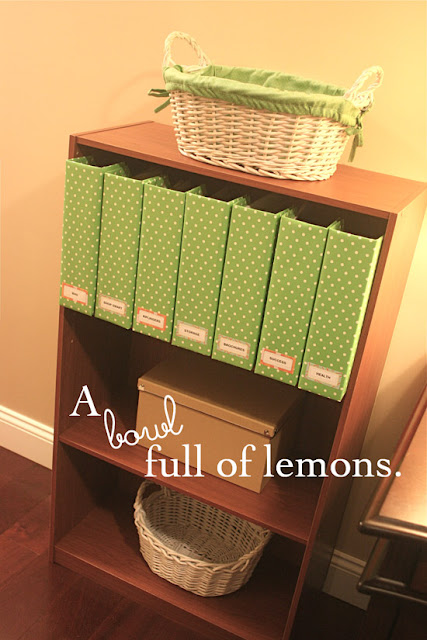
I’m so happy with the finished product…
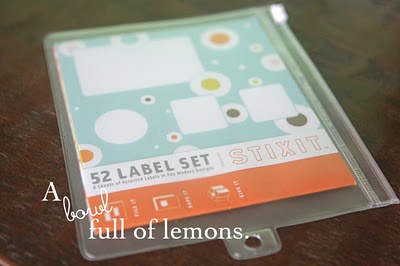
Next, I placed the labels I recieved from a white elephant gift exchange last week, on the boxes. Thanks Alexa! They are from the Container Store.
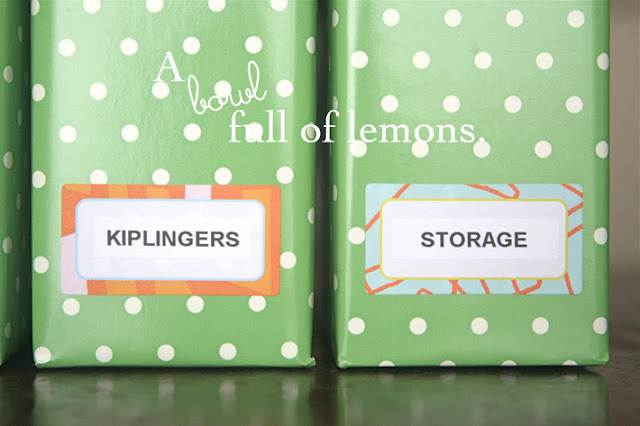
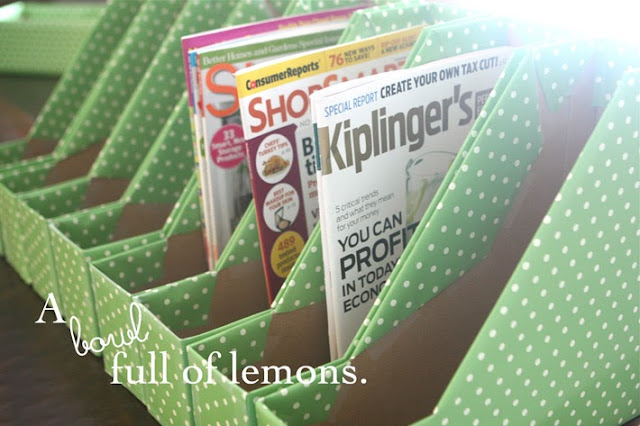
I labeled the boxes with all of my magazine subscriptions. Not only can you store magazines here, but you can store notebooks, folders, and whatever else your heart desires.
I wasn’t worried about the back side, since it won’t be facing forward or seen.
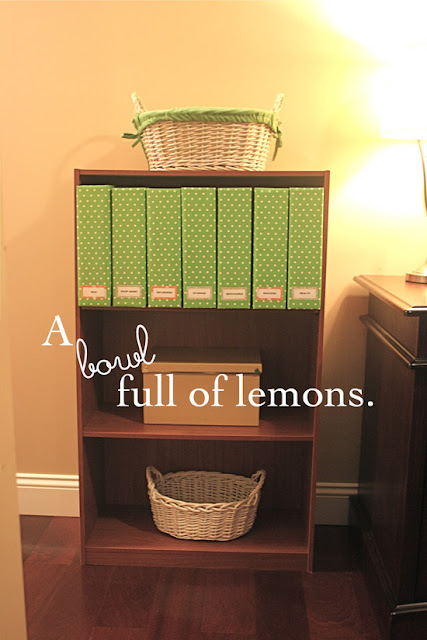
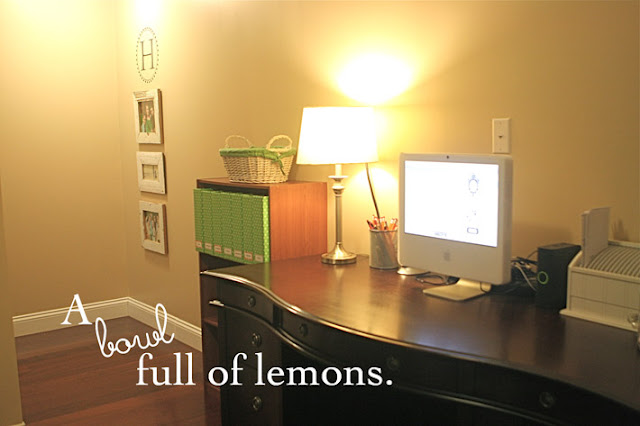
I put them on an in-expensive shelf I had stored in my basement, until I complete my office wall shelving (hopefully one day soon!).
The total cost of this project was $3.00 and it took about 1.5 hours (with my husbands help).
I love organized spaces!
Tags: magazine storage boxes, organizing, tutorials
diy, labeling, Organize, storage, Tutorials Posted in
69 comments




Ooh, I love these! I’m so horrible with wrapping gifts so I don’t think that part would work for me, but I bet I could use pieces of scrapbook paper. Thanks for sharing! Found you at Between Naps on the Porch.
~ The Speckled Dog
Thanks Kristi! Scrapbook paper would work out great and you have lots more to choose from! I would love to see your finished product. Share with us on Totally Organized Tuesdays, here on my blog.
Dude, you are so crafty it’s ridiculous. I love how the green and polka dots pop against the dark wooden desk and the matching basket on top! Be still my envious heart! GORGE-US! Great job!
So cute! I love that idea
Amazing…love it!
They’re far too pretty to hide in the basement. So perfect for a cheery office. You saved a ton of money and have a very custom look.
If only I had a bright and cheery office. My office is in the basement. IT really isnt that bad. I need to take a picture of the whole thing so you can see. Thanks for visiting!
~Toni
You are my kind of gal! Incredible! I am feeling very inspired!
xoxo,
Jen
Wow! this is super creative!
Love them!
Love these!
OMG! I have so many of those USP boxes & now I know what to do with them! thank you for a great idea! I am now following your blog!
http://www.bingopajamaswhengoodthingshappen.blogspot.com
Kristen
CUTENESS! I’m so bad I look and my magazines and then I recycle them. SO, I need to find something else to use some of these for. Fun idea!
Thanks
Jennie {Cinnaberry Suite}
Very nice!! I’m blog hopping and found your blog. I’m now following. Would love for you to check out my blog and follow back!
They turned out wonderful! I need something to hold books for my daughters room. I also love that paper you used!
What a great idea, and they came out so professional looking! I really like your blog, and I especially love your organizational tips…it makes me want to clean, which is quite a feat. I just started a link party on Wednesdays called Waking Wednesdays, and I’d love for you to share! ~ Megan from Wakinglucia.blogspot.com
I’m actually looking to buy some of these, so thank you for doing this tutorial!
I’d love to see your office once you’re done with it someday soon
Wow, Toni! How great! I am not very good at wrapping things, either! These are so cute! You are inspiring me! I am very envious of your organized home, especially that you are doing all of this before Christmas! Now you can really enjoy your home during this special time of the year!
Thanks ladies! The wrapping wasn’t too bad, as long as you have good paper.
Those are FABULOUS!!!!!!!!
Hooray! You were featured today!
Amanda
todaystoptwenty.blogspot.com
Awww… Thanks Amanda! Thats neat. Im on my way to see.
These turned out gorgeous!!!
The boxes are a lovely addition to your work space.
Thanks for linking up to Take-A-Look Tuesday at Sugar Bee Craft Edition – I featured you today! – Mandy, http://www.craftedition.blogspot.com
Mandy, Thanks! I added your link to my post. How exciting.
What a great idea. I’ll definitely being using that tutorial for my scrapbook stuff. Thanks.
What a great idea! I have been looking for cheap magazine storage boxes to Mod Podge with some maps and couldn’t find any. With it being close to Christmas, I have LOTS of boxes. I had never thought of making my own. THANKS for sharing!!
These are just fabulous! Thanks for the tutorial… I’ve been needing to buy some of these!
Love these. Tried to cut ……. any help or template ?
Brockey, Unfortunately I didnt use a template, I just used a ruler and made sure I penciled it in before I cut. I put the measurements on the picture if you can see them. This is the larger box. I hope it helps.
Thanks…. I had a hard time with the paper so i tried using fabric strips and applied mod podge. I’m not done yet but I think it’s going to work.
Brockey, Please share your boxes with me when you are finished! I would love to see them.
Thank you so much for this!!! I have a bunch of these boxes and have wanted to get magazine storage boxes for awhile, but like you could not see spending so much on them! I can’t wait to complete these!!!
I love these! I’ve been thinking of making some but cereal boxes are too flimsy. Now I know what to use instead!
I think I’m going to pull some of the fabric from my stash and try that instead though. Thanks for the idea!
This is such perfect timing! I have purchase three magazine holders (one at a time) because they are so pricey for just storage! but I really wanted a whole row like yours. i am SOOO out to get a couple inexpensive boxes and some ca-ute wrapping paper! This is an idea I have to ‘borrow.’ Thank you for such a great idea.
Thank you so much for sharing this fabulous idea & tutorial – I have a ton of magazines, both personal and business and can’t afford a ton of money to buy boxes. This is great!
Sooo cute!!! Loved the labels
What a crafty girl you are!!!!
I had soooo for ever wanted to some of these..I found some poly type ones at the Dollar Tree and some for $1 at Office Depot but haven’t found any since. I know these boxes are free at the post office.
These are super nice:)! Thank you soo much for sharing.
This is GENIUS girl! Going to make some tomorrow! Thanks!
That is such a smart idea. Love it!
I love this idea and I am going to do it next week with some of the boxes we got recently that are the same size. I have one question – you wrote the lines are 3 inches wide but in the picture you have that the line is 4 inches wide. It sort of looks like the line is 3 inches up and 4 inches wide in the photo so I am going to do one that way (well I guess 2 that way). If that’s not right can you let me know? Love your blog
I love this idea! I’m going to the post office to get boxes tomorrow and will make them for everyone in my family.
Thanks!
Heidi
PS. How would I go about advertising on your blog? Please e-mail me Heidikempcarter@comcast.net
I made some of these last night but used contact paper to cover. It turned out super cute and they can wipe off when dirty.
Um. Hi. YOU are a genius. Thanks for the inspiration.
Just an FYI for everyone. It’s a federal crime to take these boxes for personal use. I don’t care either way, and nobody would care about people using leftovers. But you should know
Just an FYI for everyone. It’s a federal crime to take these boxes for personal use. I don’t care either way, and nobody would care about people using leftovers. But you should know
Hello and thank you. I just finished my first of many of these I am going to be making. My prototype was a cereal box which worked great and the rest of them will be out of cereal boxes as well…..we have lots of them and it is not a federal crime…. I did like comment about using contact paper and them being washable. will have to see what i have around here. thanks for sharing. found your blog on pinterest. charlotte
munto criativo eu amei !!!
THANK YOU!! You saved me a boat load of cash!! I googled “DIY magazine storage” and there you were! I already have new USPS boxes.
wow.. they are too cute .. i love it.. i did mines but are a little plain. love your idea.. thanks for the post..
Hello, if someone has trouble covering their storage boxes, maybe cut contact paper into small squares and make sure some over lap the edges to cover the whole thing.
Hi I love these! Can you tell me what size the original boxes were? I’m on a little rock called the Isle of Man where we don’t have these exact boxes. I want to use them to put the back side (where the labels are) down on the shelf in the kitchen cupboards, apparently they are the perfect size for storing tins! The cheapest I have found to buy seem to be about £8 ($10 – 11?).
I use the UPS ‘small box’ it is 13″ x 11″ x 2″ —–
I just found this post using Google. Cut them out quickly, but will have to wait on covering them until I can get to the store. I’m using mine to hold recipe magazines like “A Taste of Home” on my recipe book shelf. Looks sooooo much neater! Thanks for the tutorial.
Wine cartons that hold six bottles are also good for storing your magazines. Just cut one side down and across the front and back up the other side. Mark it first if you do not have straight eye. You can cover if you wish. I don’t bother and I have about 200 mags and they look okay on a shelf
Lenore
Try using 6 bottle wine cartons. They will do the same job. Most wine outlets will give them free. Do the same as above. They work with my 200 odd mags
Lenore
Thank you so much! I need them for my new classroom, but I have already spent way too much of my own money. This helps me get them done today! Do you think contact paper would work!
I would definitely give it a try!
Ikea sells magazine storage boxes very cheaply, but not cute. I’m wrapping mine, with my Hobby Lobby red polka dot paper. (Kind of wish you showed how you wrapped them. Looks tricky.)
What a great idea! I have the store bought boxes for my magazines but I was about to buy one to store my foil, wax paper and parchment paper in the kitchen cabinet. I will definitely be making this. Thanks!
Love this idea. My daughter has just got a desk for her bedroom and she needs some storage. I think we’ll try making these together
Wow! I’m a guy, so probably not your target audience; but I’m totally going to do this for my comic book collection! Thanks so much!!
I’m glad it works for you! Being organized isn’t a “Girl” thing… it’s about having a place for everything so everything can be returned to its place.
I love this idea so much. Like you I have priced these at so many different places and just didn’t want to pay the prices they sell them for.
Now, my magazines over run my home. I have too many subscriptions. So, as I wait for them to dwindle down and start using digital copies I will use your idea to store them. Thank you so much for all of your awesome ideas and suggestions. Tips and tutorials too!!!
Actually if you don’t have USPS boxes lying around and don’t want to break the law, IKEA sells plain cardboard boxes called “FLYT” and they are $1.99 for 5. So I did a similar thing and traced the boxes. Best thing to do is to trace the size of the box and then cut a little extra to wrap around it.
i messed up somehow when i tried to do this project. is there a video i could see on how to cut the box?